Picked green beans but didn’t have quite enough to can, so I tossed ’em in the fridge. Monday rolled around, picked more, snapped ’em that night while catching up on laundry and let ’em chill in the fridge again.
Tuesday morning, I canned them—without a pressure cooker. Yep, old-school water bath. You can totally do this if you’re working with smaller harvests or don’t feel like dragging out heavy gear. It’s slow, but it works.
Green beans stay crisp, the jars seal up just fine, and you get to put up food without fussing too hard. If your garden’s giving just enough every few days, this is a solid way to keep up with it.
Nothing fancy. Just home food, done right.
What’s Better: Pressure Canning or Without?
There’s a lot of debate around this, and I’ll be real with you. Pressure canning is considered the safer way because green beans are a low-acid food, which means they can grow harmful bacteria if not canned correctly. The USDA recommends using a pressure canner.
But in my kitchen, I still use the water bath method for green beans. I’ve been doing it this way for over 15 years and never had a single bad jar. I just make sure I boil them long enough—three hours—and I always use clean jars, fresh beans, and follow my process carefully.
That being said, you should use your own judgment. This is a traditional homesteading method, and while it’s not government-approved, it’s still used by plenty of folks today, especially here in the Midwest.
Ingredients for Canning Green Beans
- Fresh green beans – about 12 to 16 cups (you’ll want enough to fill 4 quart jars once snapped)
- Canning salt – 1 teaspoon per quart jar (or ½ teaspoon per pint jar)
- Filtered or clean tap water – enough to fill your jars and water bath canner
Supplies You’ll Need
- Quart or pint-size canning jars (washed and sanitized)
- New canning lids and rings
- Large water bath canner or a deep pot with a rack
- Large bowl or colander
- Clean towels or a rug for cooling
- Jar lifter (this makes handling hot jars so much easier)
How to Make Canning Green Beans Without Pressure Cooker
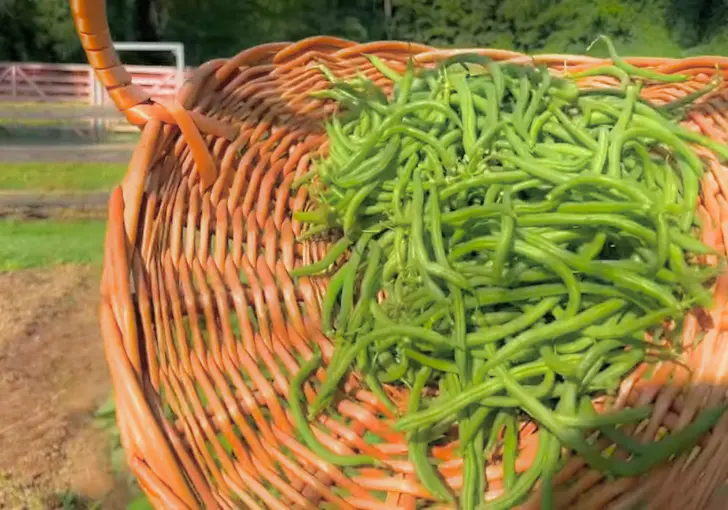
Step 1: Pick and Store the Beans
If you’re not picking all your green beans at once, that’s totally fine. I picked mine, didn’t have enough, so I tucked them in the fridge. You can store fresh-picked beans in the fridge for 3 to 4 days just fine.
Then, I picked again and had enough for a canning batch. It’s okay to gather them over a couple days—just keep ’em cool and dry in the fridge.
Step 2: Snap and Prep
Snapping is easy. I like to cut off both ends of each bean. Some folks leave the tail on, but I take it off. Then just cut the beans into whatever size pieces work for you. I go smaller since it’s easier for kids to chew.
After snapping, I washed them with a fruit and veggie soak, but plain cold water works too. Just make sure to rinse them off good.
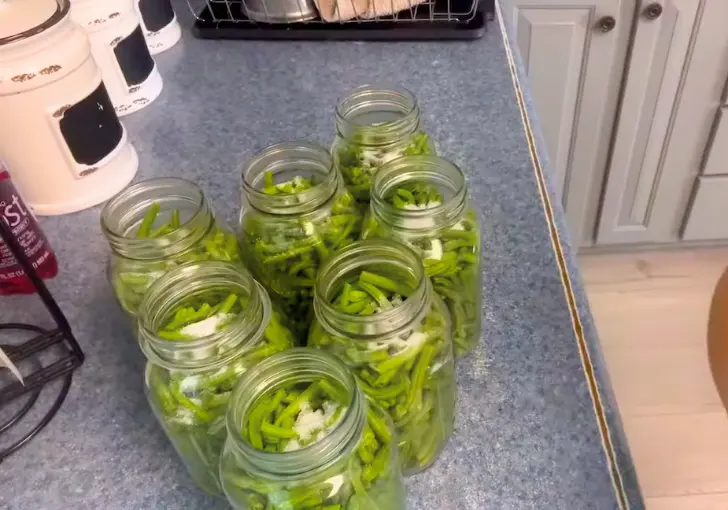
Step 3: Fill the Jars
Start packing the beans into clean, sanitized jars. I use quarts, but pints work too. Fill them tight—really stuff ’em in. I bang the bottom of the jar in the palm of my hand a few times just to settle the beans so I can add more. You want them pretty full, because they shrink up a little when canned.
Step 4: Add Salt and Water
Add 1 teaspoon of canning salt to each quart jar, or ½ teaspoon if you’re using pints. Then pour hot water into the jars, right up to the neck—just enough to cover the beans. Don’t overflow. Wipe the rim of each jar with a clean cloth to make sure there’s no residue.
Run your finger around the rim to check for chips—any little crack can keep it from sealing right.
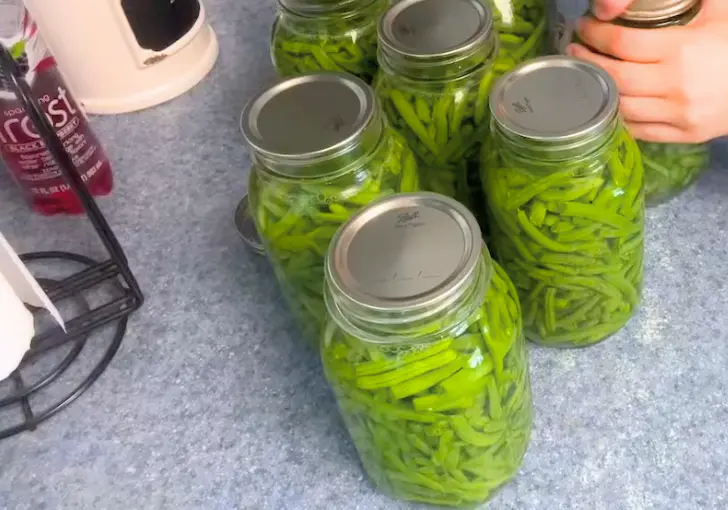
Step 5: Seal the Jars
Once the jars are filled, place the lids on and screw the rings on finger-tight. Don’t crank them down hard—just snug enough to hold while they process.
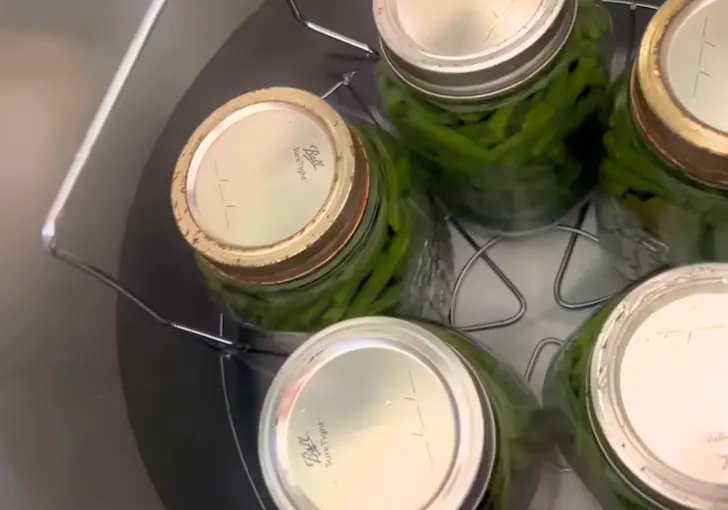
Step 6: Process in Water Bath
Place the jars in your water bath canner. Add hot water until it reaches the necks of the jars. Turn your heat to medium and bring it to a boil. Once it starts boiling, set your timer for 3 full hours.
Keep an eye on the water level—you may need to add more boiling water during that time to keep jars fully covered. It’s a long boil, but that’s how we do it without a pressure canner.
Step 7: Cool and Check Seals
After the 3 hours, turn off the heat and let the water stop bubbling. Then gently pull the jars out and set them on a towel or rug where they won’t get bumped. Let them cool slowly. Don’t touch the lids.
After several hours, once they’re fully cooled, check each lid. If it’s sealed, it’ll be sucked down and won’t flex. If any didn’t seal, pop them in the fridge and use within a few days.
Canning Notes
- Use only clean, fresh beans. Avoid ones that feel slimy or look old.
- Sanitize everything. Jars, lids, rings—don’t skip this step.
- Don’t overpack jars. If they’re too full, they may not seal right.
- Keep water boiling. A light simmer won’t cut it.
- Let them cool slow. Don’t place hot jars on a cold surface. They can crack.
Watch Out for These Mistakes While Canning Green Beans
Even one small mistake can mess up your whole batch. I’ve learned the hard way over the years. Here’s what to avoid:
- Skipping the full 3-hour boil. This is key if you’re not using a pressure cooker.
- Using old or re-used lids. Always use new ones.
- Not leaving headspace. Overfilled jars may not seal right or could leak.
- Starting with cold water. Always use warm to hot water to avoid cracking jars.
- Forgetting to check seals. If one didn’t seal, pop it in the fridge and eat soon.
How To Use These Canned Green Beans
These canned beans are so handy. Heat ‘em up with a dab of butter and salt for a fast side dish. I also toss them into stews, casseroles, and even pasta salads.
You can mash them lightly and mix with garlic butter too—just like my Hot n Juicy Garlic Butter Sauce pairs with seafood.
Canning Green Beans Without Pressure Cooker FAQs
1. Is it safe to can green beans without a pressure cooker?
It’s a debated topic. USDA says no, but many homesteaders still use this method. The key is boiling for at least 3 hours and using clean, fresh ingredients. It’s a traditional method, so use your own judgment.
2. How long do canned green beans last?
When stored right in a cool, dark place, they can last up to one year. Always check the seal before opening.
3. Can I skip the salt?
Yes, you can. Salt is mainly for flavor, not preservation. But I like adding it because it brings out the taste in the beans.
4. Why do my jars sometimes not seal?
Could be a few reasons—over-tightened lids, leftover food on the rim, or damaged jar edges. Always check before sealing and don’t rush.
5. Can I use sea salt or table salt instead?
Stick with canning salt. Other salts have additives that might cloud your jars or mess with sealing.
6. Do I have to blanch the beans first?
Nope! That’s what I love about this method. You pack the beans raw. Super simple and fast.
7. What if my beans float in the jar?
Totally normal. They’ll settle a bit over time. As long as the jars sealed, you’re good.
8. Can I add garlic or herbs?
You can, but be careful. Adding extras changes the acidity, which could affect safety. I keep it plain and season when I open the jar.
9. Is a 3-hour boil really enough?
In traditional water bath methods, yes. It’s what makes this method safe-ish. Don’t cut it short.
10. What size jars work best?
I like quart jars for big batches and pints for quick meals. Both work—just adjust the salt amount.
Canning Green Beans Without Pressure Cooker
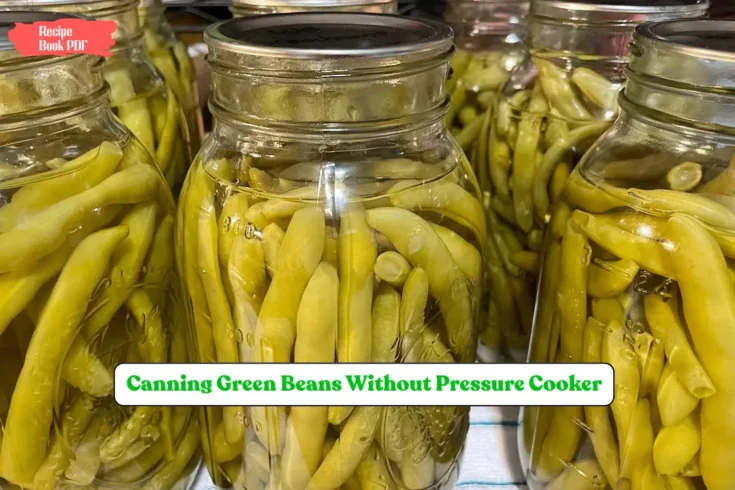
Learn my simple step-by-step method for canning green beans without pressure cooker just like my mama taught me. This old-fashioned water bath way is easy to follow and uses basic tools. If you’ve got fresh green beans and a big pot, you’re ready to can like a pro—no pressure canner needed.
Ingredients
- Fresh green beans – about 12 to 16 cups (you’ll want enough to fill 4 quart jars once snapped)
- Canning salt – 1 teaspoon per quart jar (or ½ teaspoon per pint jar)
- Filtered or clean tap water – enough to fill your jars and water bath canner
Supplies Needed for Canning Green Beans
- Quart or pint-size canning jars (washed and sanitized)
- New canning lids and rings
- Large water bath canner or a deep pot with a rack
- Large bowl or colander
- Clean towels or a rug for cooling
- Jar lifter (this makes handling hot jars so much easier)
Instructions
- Pick your green beans fresh. If you don’t have enough right away, store them in the fridge for up to 3–4 days until you do.
- Snap off both ends of each bean. Cut them into bite-sized pieces. Rinse well with cold water or use a veggie wash if you like.
- Fill clean jars tightly with beans. Tap the jar gently on your hand to help settle them so you can pack in more.
- Add 1 teaspoon canning salt per quart (½ tsp per pint). Fill jars with hot water to cover the beans, leaving about ½ inch space at the top.
- Wipe jar rims clean. Check for any chips. Add lids and screw bands on finger-tight.
- Place jars in a water bath canner. Add hot water until it reaches the necks of the jars. Bring to a boil. Once boiling, process for 3 hours. Add more boiling water if needed to keep jars covered.
- Turn off the heat and let jars sit a few minutes. Carefully lift them out and set on a towel. Let cool 12–24 hours. Check lids to make sure they sealed. Store in a cool, dark place.
Nutrition Information:
Amount Per Serving: Calories: 35Sodium: 290mgCarbohydrates: 7g
Nutrition info is an estimate based on average values and ingredients used. Your actual results may vary depending on bean type, salt amount, and serving size. Always consult with a nutritionist if needed.